原生javascript淡入淡出焦点图实现思路
淡入淡出焦点图效果类
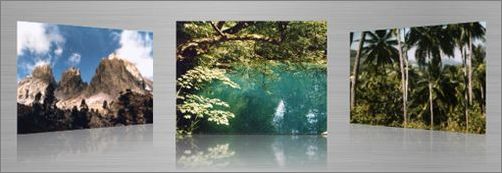
这里是缓动焦点图:
JavaScript 缓动焦点图实现的几种写法:封装+函数式+JQuery http://www.2cto.com/kf/201205/131579.html
焦点图
实现思路:
类的调用方式:
var slider1 = new Slider({
id:'focus_pic', /**包裹图片的UL的ID**/
btnId:"focus_btn", //幻灯片按钮的ID,可以用来控制CSS显示
//step:5, //透明度变化步长,默认为2
autoTime:2000//自动播放间隔时间
});
幻灯片的HTML书写方式:
<ul id="focus_pic">
<li><a target="_blank" href="javascript:"><img src="http://www.2cto.com/uploadfile/2012/0515/20120515095440867.jpg"
width="530" height="180" alt=""></a></li>
<li><a target="_blank" href="javascript:"><img src="http://www.2cto.com/uploadfile/2012/0515/20120515095440504.jpg"
width="530" height="180" alt=""></a></li>
<li><a target="_blank" href="javascript:"><img src="http://www.2cto.com/uploadfile/2012/0515/20120515095441386.jpg"
width="530" height="180" alt=""></a></li>
<li><a target="_blank" href="javascript:"><img src="http://www.2cto.com/uploadfile/2012/0515/20120515095441330.jpg"
width="530" height="180" alt=""></a></li>
</ul>
幻灯片的所有代码:
?
<!DOCTYPE html PUBLIC "-//W3C//DTD XHTML 1.0 Transitional//EN"
"http://www.w3.org/TR/xhtml1/DTD/xhtml1-transitional.dtd">
<html xmlns="http://www.w3.org/1999/xhtml">
<head>
<meta http-equiv="Content-Type" content="text/html; charset=utf-8"/>
<title>焦点图</title>
<style type="text/css">
#focus_box {
position: relative;
margin: 0 auto;
zoom: 1;
width: 530px;
height: 180px;
overflow: hidden;
}
#focus_box ul {
list-style: none;
padding: 0;
margin: 0;
}
#focus_btn {
position: absolute;
right: 5px;
bottom: 5px;
z-index: 2;
}
#focus_pic {
position: absolute;
}
#focus_pic li {
position: absolute;
left: 0;
}
#focus_pic li img {
border: none;
float: left;
}
#focus_btn li {
float: left;
font-size: 12px;
width: 25px;
height: 25px;
line-height: 25px;
font-weight: bold;
text-align: center;
background: #fff;
color: #000;
margin-right: 2px;
cursor: pointer;
border-radius: 20px;
}
#focus_btn li.on {
background: #f60;
color: #fff;
}
#focus_box1 {
position: relative;
margin: 0 auto;
overflow: hidden;
zoom: 1;
}
#focus_box1 ul {
list-style: none;
padding: 0;
margin: 0;
}
</style>
</head>
<body>
<div id="focus_box">
<ul id="focus_pic">
<li><a><img src="http://www.2cto.com/uploadfile/2012/0515/20120515095440867.jpg"></a></li>
<li><a><img src="http://www.2cto.com/uploadfile/2012/0515/20120515095440504.jpg"></a></li>
<li><a><img src="http://www.2cto.com/uploadfile/2012/0515/20120515095441386.jpg"></a></li>
<li><a><img src="http://www.2cto.com/uploadfile/2012/0515/20120515095441330.jpg"></a></li>
</ul>
</div>
<script type="text/javascript">
(function () {
//先设置两个简洁函数获取ID,设置透明度
var $ = function () {
var elements = new Array();
for (var i = 0; i < arguments.length; i++) {
var element = arguments[i];
if (typeof element == 'string')
element = document.getElementById(element);
if (!element) continue;
if (arguments.length == 1) return element;
elements.push(element);
}
return elements;
};
var setOpacity = function (node, level) {
node = $(node);
if (document.all) {
node.style.filter = 'alpha(opacity=' + level + ')';
} else {
node.style.opacity = level / 100;
}
};
var getTag = function (child, parent) {
return parent.getElementsByTagName(child);
};
var bindEvent = function (element, type, func) {
if (element.addEventListener) {
element.addEventListener(type, func, false); //false 表示冒泡
} else if (element.attachEvent) {
element.attachEvent('on' + type, func);
} else {
element['on' + type] = func;
}
};
function Slider(options) {
var id = options.id;
var warper = this.warper = $(id);//获取包裹图片DOM(第一个UL的ID)
var warpLis = this.warpLis = getTag("li", warper);//获取包裹下的LI子元素
this.no = warpLis.length;//获取包裹LI元素的个数
this.step = options.step || 2;
this.autoTime = options.autoTime || 1000; //自动播放间隔时间
this.btnId = options.btnId || "focus_btn"; //图片上面的数字按钮的ID
this.index = 1; // 开始变幻时的下一个INDEX
this.preIndex = 0;
this.init();
}
Slider.prototype = {
init:function () {
this.makeBtn(this.no, this.btnId);
this.autoPlay();
},
makeBtn:function (no, c) {//生成按钮 no表示个数 C表示UL的ID
var btnUl = this.btnUl = document.createElement("ul");
btnUl.id = c;
for (var i = 0; i < no; i++) {
var li = document.createElement('li');
if (i == 0) li.className = 'on';
var text = document.createTextNode(i + 1);
li.appendChild(text);
setOpacity(li, 80);
// 绑定鼠标事件,传递当前的INDEX和preIndex
bindEvent(li, 'mouseover', function (obj, t) {
return function () {
obj.mouseOn.call(obj, t);
}
}(this, i));
btnUl.appendChild(li);
}
this.warper.parentNode.appendChild(btnUl);//添加到父div下
},
autoPlay:function(){
var that = this;
// 执行播放
clearTimeout(this.T1);
this.T1 = setTimeout(function(){that.fadeIn(that.index)},that.autoTime);
},
fadeIn:function(index){
var thisObj = this.warpLis[index];
var thisOpacity = 0; //当前透明度从0渐入
var that = this;
// 底部按钮的同步,与当前的图层Z-index始终在上面
var btnLi = getTag('li', this.btnUl);
for (var i = 0, n = btnLi.length; i < n; i++) {
btnLi[i].className = '';
// 移除所有的Zindex
this.warpLis[i].style.zIndex = '';
}
//在改变INDEX之前先设置透明度为0
setOpacity(this.warpLis[index],0);
// 设置前一个图片的Zindex
this.warpLis[that.preIndex].style.zIndex = 1;
// 设置当前图片的Zindex
this.warpLis[index].style.zIndex = 2;
btnLi[index].className = 'on';
//淡入动画
if(that.T2)clearInterval(that.T2);
this.T2 = setInterval(function(){
setOpacity(thisObj,thisOpacity++); // 设置透明度渐入
if(thisOpacity == 100){
thisOpacity = 0;
clearInterval(that.T2);
that.T2 = null;
that.preIndex = that.index ++;
if(that.index == that.no)that.index = 0;
that.autoPlay();
}
},10);
},
mouseOn:function(index){
this.index = index;
this.fadeIn(index);
}
};
var slider1 = new Slider({
id:'focus_pic', /**包裹图片的UL的ID**/
btnId:"focus_btn", //幻灯片按钮的ID,可以用来控制CSS显示
//step:5, //透明度变化步长,默认为2
autoTime:2000//自动播放间隔时间
});
})();
</script>
</body>
</html>
摘自 VVG