完美的服务器--Ubuntu 9.04 ISPconfig设置 (上)
本手册向您介绍Ubuntu 9.04服务器设置,定位于ISP和站长们的需求,包括:Apache web server (SSL-capable), Postfix mail server with SMTP-AUTH and TLS, BIND DNS server, Proftpd FTP server, MySQL server, Courier POP3/IMAP, Quota, Firewall, 等.最后您应该有一个可靠的,可定制的,同时可以自由安装网络控制面板的服务器.
我将使用以下软件包:
Web Server: Apache 2.2 with PHP 5.2.6, Python, Ruby, and WebDAV
Database Server: MySQL 5.0
Mail Server: Postfix
DNS Server: BIND9
FTP Server: proftpd
POP3/IMAP: I will use Maildir format and therefore install Courier-POP3/Courier-IMAP.
Webalizer for web site statistics
我想首先声明这不是唯一设置这种服务器的方法,还有很多方法可以完成这个目标,但这是我使用的方法,我不保证这对您也有效。
1,安装需求:
安装之前您需要Ubuntu 9.04 server CD, 这里有: ftp://releases.ubuntu.com/releases/9.04/ubuntu-9.04-server-i386.iso (i386) 或者 ftp://releases.ubuntu.com/releases/9.04/ubuntu-9.04-server-amd64.iso (x86_64)
以及快速的网络连接
2,注意
在手册中我使用主机名server1.example.com 和IP地址192.168.0.100 网关192.168.0.1,你的设置可能与这个不同,所以你必须合理的设置它们
3,基本系统
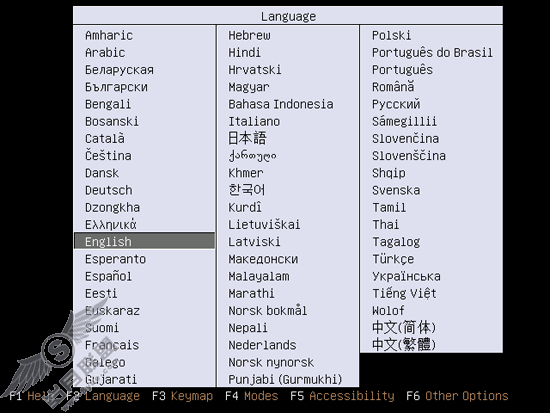
插入UBUNTU 安装CD到您的CD-ROM从CD引导,选择合适的语言:
然后选择安装Unbutu Server

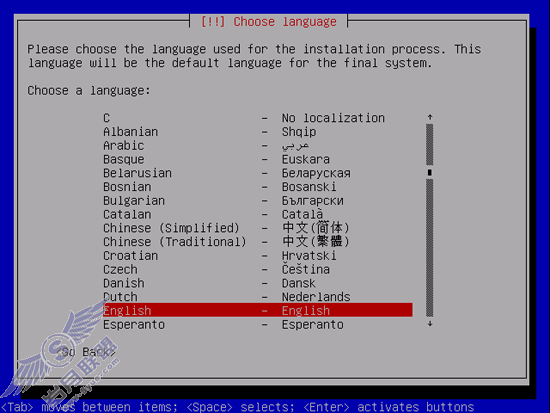
再次选择语言
选择您的位置


选择键盘类型(你会被要求按一些键,然后系统会根据它们来判断你的键盘类型)

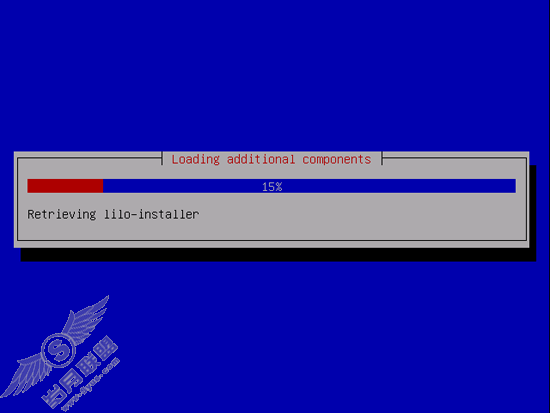
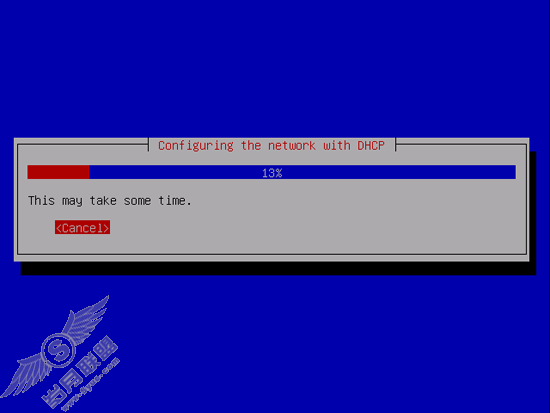
安装程式会检查安装CD,硬件,配置DHCP网络,如果您的网络中有个DHCP服务器
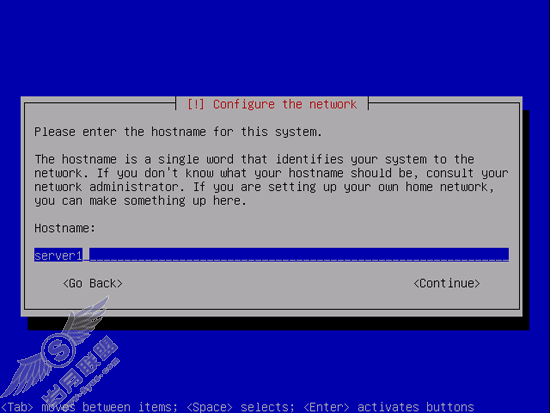
输入主机名,我的是server1.example.com所以我输入server1
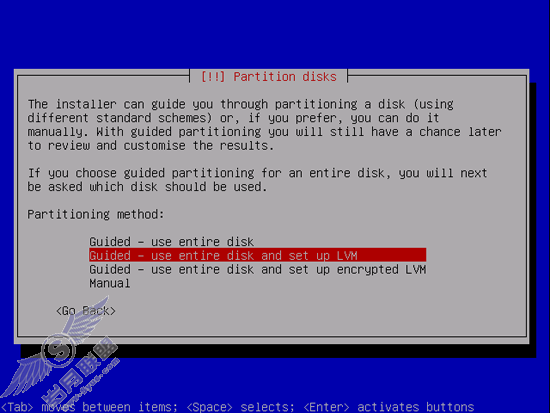
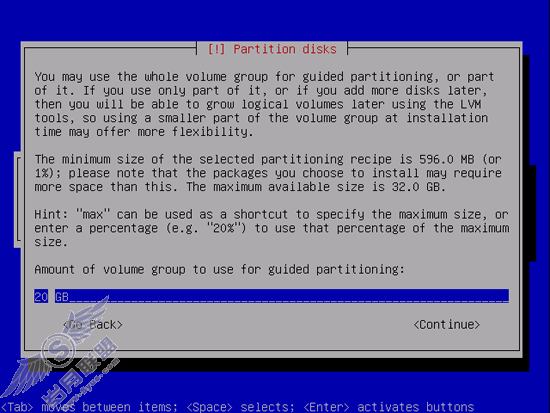
现在你有一个分区在硬盘上,为了简单起见我选择:向导 - 使用整个磁盘然后设置LVM,这将创建一个包含两个逻辑卷的磁盘卷组,一个是/,另一个是交换分区(当然,这完全取决于你,如果你知道你在干什么,你可以手动分区)
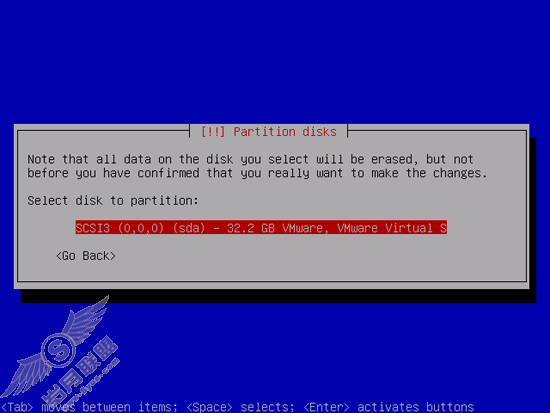
选择您想要操作的磁盘:
当您被问到:将分区写入磁盘后设置LVM时,选择YES
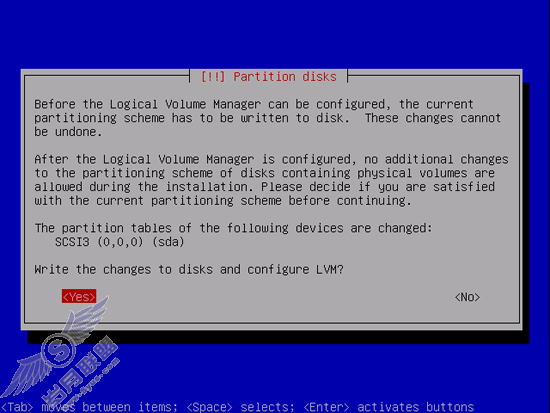
如果你选择了:向导 - 使用整个磁盘并配置LVM,磁盘分割程序将创建一个使用整个磁盘空间的大卷组,现在你可以为逻辑分区/和SWAP分配空间了,比较明智的选择是预留一些空闲空间,以便你以后可以创建新逻辑磁盘,增加灵活性。
完成后,问你是否要将改变写入磁盘,选择YES
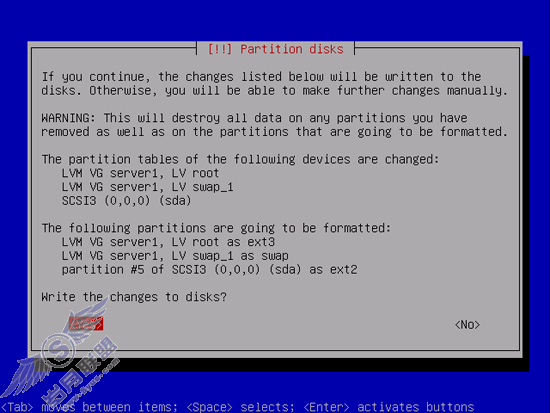
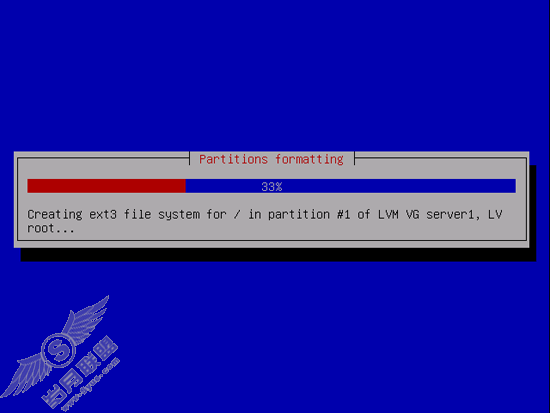
然后,你的分区将被创建和格式化
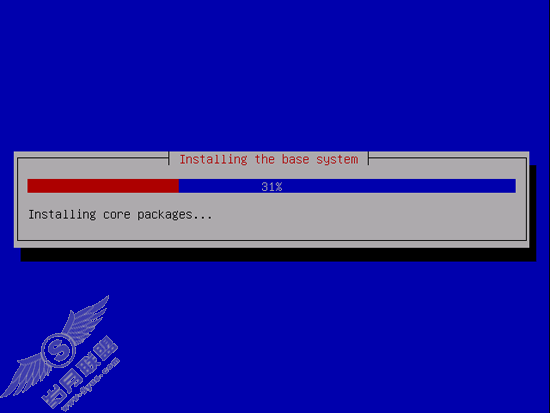
然后基本系统将被安装
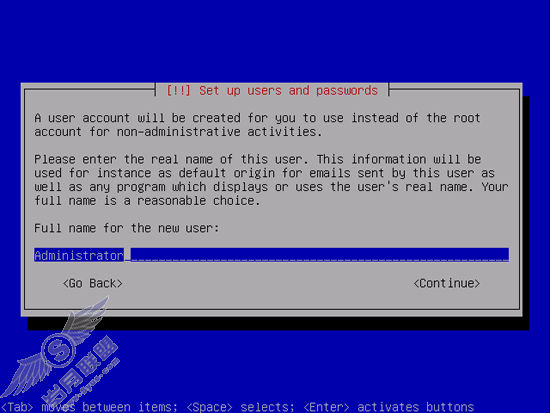
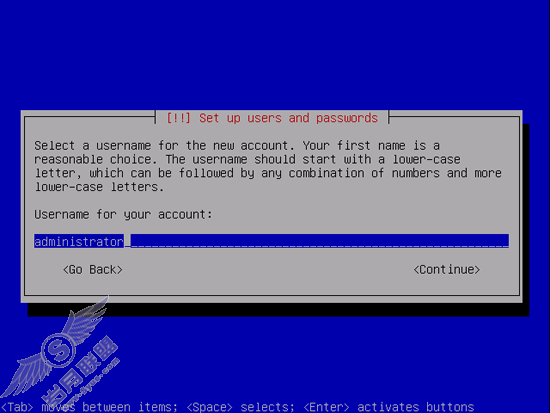
创建一个用户,比如Administrator 用户名 administrator(不要使用admin做为用户名,它是Ubuntu 9.04的保留名字)
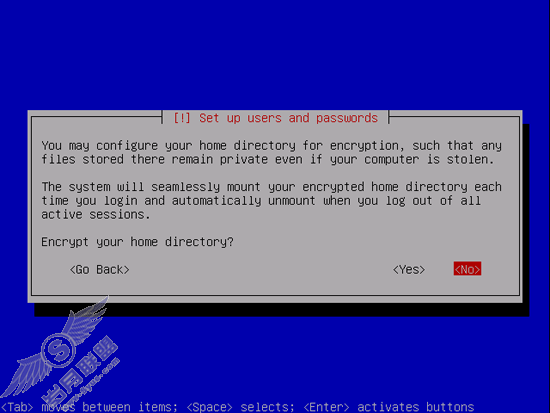
我不需要加密的私有文件夹,所以我选择NO
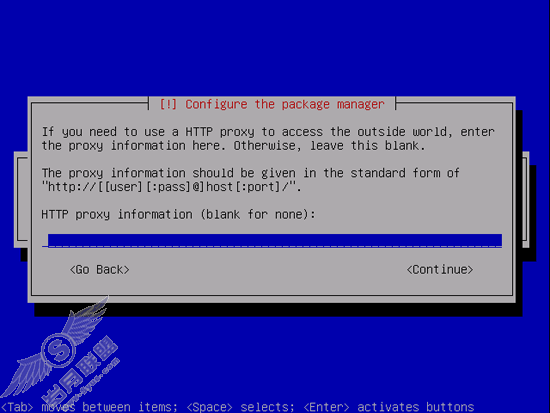
下面是配置软件包管理工具apt,将HTTP代理置空,除非你有一个代理服务器

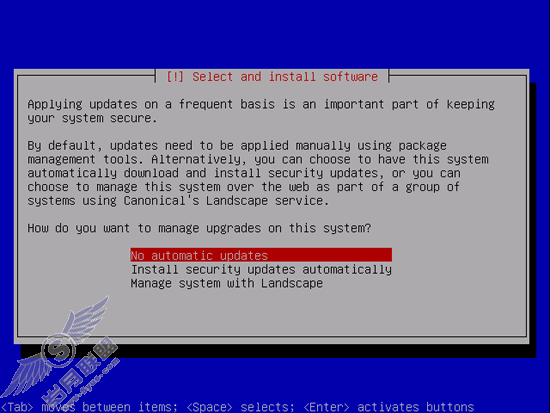
我比较保守,所以我只想手动更新服务器以更多控制服务器,所以我选择不自动更新,当然这取决于你
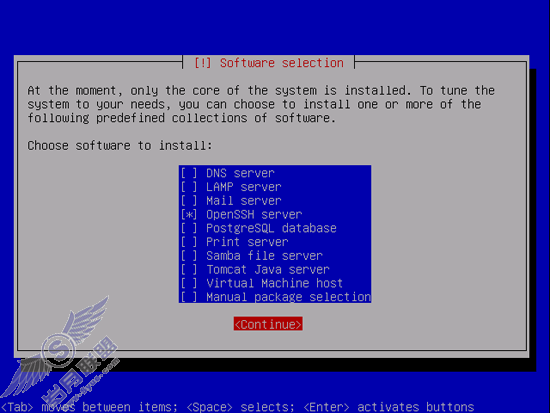
我们需要一个DNS, mail, and LAMP 服务器,但我现在我不选择它们,因为我想完全控制它们,需要的软件包我将手动安装,我现在只选择Open-ssh Server,以便我能使用PUTTY一类的软件马上取得远程控制权限。
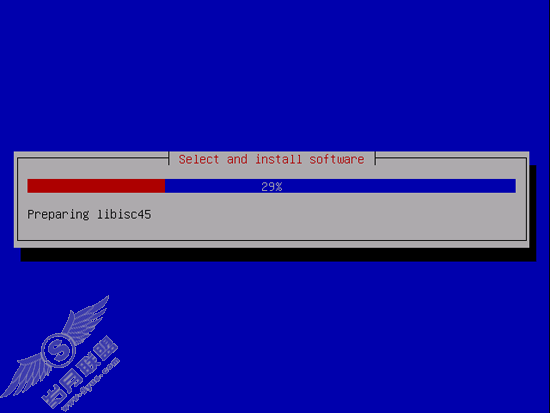
安装过程继续
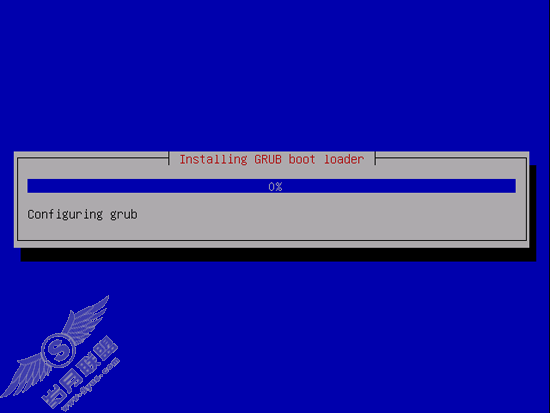
GRUB引导器被安装
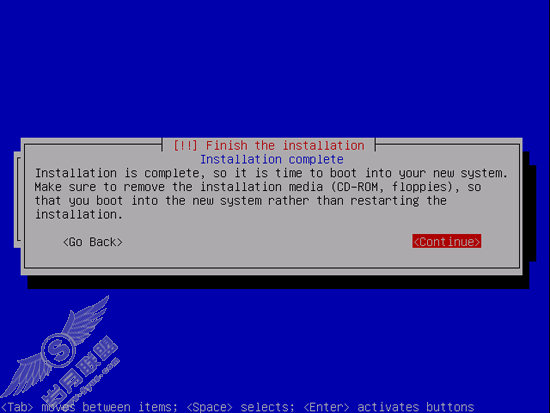
基本系统现在安装完成,取出CD,然后继续以重启系统
4,取得ROOT权限
重启后你可以用之前创建的用户名登录,因为本手册中每步我们都必须用root权限,我们可以使用sudo前置每个命令,或者现在就变成root:
sudo su
(你也以启动root登录)
sudo passwd root
给定root密码,但这不是推荐做法原因可以看这里: http://ubuntuforums.org/showthread.php?t=765414
5,安装SSH Server (可选)
如果你在系统安装里没有安装,你现在可以:
aptitude install ssh openssh-server
现在你可以用SSH客户端比如PUTTY从你的工作站上继续安装进程
6,安装 vim-nox(可选)
我将使用vi作为编辑器,DEBIAN和UBUNTU上默认的vi有些古怪的行为,所以我安装vim-nox
aptitude install vim-nox
(你不一定要做这一步,如果你有另一个文本编辑器,比如joe或者nano)
7,设置网络
因为Ubuntu安装器已经通过DHCP服务器设置了网络,所以你必须改变它,因为一个服务器应该有一个静态的网络设置。编辑 /etc/network/interfaces 然后把它设置成你需要的地址(本例中我将使用192.168.0.100作为IP地址)
   vi /etc/network/interfaces

   # This file describes the network interfaces available on your system


   # and how to activate them. For more information, see interfaces(5).

   # The loopback network interface

   auto lo

   iface lo inet loopback

   # The primary network interface

   auto eth0

   iface eth0 inet static

   address 192.168.0.100

   netmask 255.255.255.0

   network 192.168.0.0

   broadcast 192.168.0.255

   gateway 192.168.0.1
然后重启你的网络服务
/etc/init.d/networking restart
然后编辑你的/etc/hosts.使它看起来像这样:
   vi /etc/hosts


   127.0.0.1       localhost.localdomain   localhost

   192.168.0.100   server1.example.com     server1

  # The following lines are desirable for IPv6 capable hosts

   ::1     localhost ip6-localhost ip6-loopback

   fe00::0 ip6-localnet

   ff00::0 ip6-mcastprefix

   ff02::1 ip6-allnodes

   ff02::2 ip6-allrouters

   ff02::3 ip6-allhosts
现在运行
   echo server1.example.com > /etc/hostname

   /etc/init.d/hostname.sh start
然后运行
   hostname

   hostname -f
现在两个都应该显示server1.example.com
8,编辑/etc/apt/source.list 然后更新你的linux安装
编辑/etc/apt/source.list,注释掉安装CD这行,确保universe和mulitverse库已启用,看起来应该是这样
   vi /etc/apt/source.list

 #


   # deb cdrom:[Ubuntu-Server 9.04 _Jaunty Jackalope_ - Release amd64 (20090421.1)]/ jaunty main restricted

   #deb cdrom:[Ubuntu-Server 9.04 _Jaunty Jackalope_ - Release amd64 (20090421.1)]/ jaunty main restricted

   # See http://help.ubuntu.com/community/UpgradeNotes for how to upgrade to

   # newer versions of the distribution.

   deb http://de.archive.ubuntu.com/ubuntu/ jaunty main restricted

   deb-src http://de.archive.ubuntu.com/ubuntu/ jaunty main restricted

   ## Major bug fix updates produced after the final release of the

   ## distribution.

   deb http://de.archive.ubuntu.com/ubuntu/ jaunty-updates main restricted

   deb-src http://de.archive.ubuntu.com/ubuntu/ jaunty-updates main restricted

   ## N.B. software from this repository is ENTIRELY UNSUPPORTED by the Ubuntu

   ## team. Also, please note that software in universe WILL NOT receive any

   ## review or updates from the Ubuntu security team.

   deb http://de.archive.ubuntu.com/ubuntu/ jaunty universe

   deb-src http://de.archive.ubuntu.com/ubuntu/ jaunty universe

   deb http://de.archive.ubuntu.com/ubuntu/ jaunty-updates universe

   deb-src http://de.archive.ubuntu.com/ubuntu/ jaunty-updates universe

   ## N.B. software from this repository is ENTIRELY UNSUPPORTED by the Ubuntu

   ## team, and may not be under a free licence. Please satisfy yourself as to

   ## your rights to use the software. Also, please note that software in

   ## multiverse WILL NOT receive any review or updates from the Ubuntu

   ## security team.

   deb http://de.archive.ubuntu.com/ubuntu/ jaunty multiverse

   deb-src http://de.archive.ubuntu.com/ubuntu/ jaunty multiverse

   deb http://de.archive.ubuntu.com/ubuntu/ jaunty-updates multiverse

   deb-src http://de.archive.ubuntu.com/ubuntu/ jaunty-updates multiverse

   ## Uncomment the following two lines to add software from the 'backports'

   ## repository.

   ## N.B. software from this repository may not have been tested as

   ## extensively as that contained in the main release, although it includes

   ## newer versions of some applications which may provide useful features.

   ## Also, please note that software in backports WILL NOT receive any review

   ## or updates from the Ubuntu security team.

   # deb http://de.archive.ubuntu.com/ubuntu/ jaunty-backports main restricted universe multiverse

   # deb-src http://de.archive.ubuntu.com/ubuntu/ jaunty-backports main restricted universe multiverse

   ## Uncomment the following two lines to add software from Canonical's

   ## 'partner' repository.

   ## This software is not part of Ubuntu, but is offered by Canonical and the

   ## respective vendors as a service to Ubuntu users.

   # deb http://archive.canonical.com/ubuntu jaunty partner

   # deb-src http://archive.canonical.com/ubuntu jaunty partner

   deb http://security.ubuntu.com/ubuntu jaunty-security main restricted

   deb-src http://security.ubuntu.com/ubuntu jaunty-security main restricted

   deb http://security.ubuntu.com/ubuntu jaunty-security universe

   deb-src http://security.ubuntu.com/ubuntu jaunty-security universe

   deb http://security.ubuntu.com/ubuntu jaunty-security multiverse

   deb-src http://security.ubuntu.com/ubuntu jaunty-security multiverse
然后运行
aptitude update
更新apt包库,运行
aptitude safe-upgrade
以安装最新更新(如果有的话)。如果你看到有新的内核作为更新的一部被安装了,你应该重启系统:
reboot
9,更改默认的shell
/bin/sh是一个到/bin/dash的软链接,我们需要的是/bin/bash,所以我们这样:
dpkg-reconfigure dash
Install dash as /bin/sh? <-- No
如果你不这样做,ISPConfig 安装将失败。
10,禁用Apparmor
Apparmor是一个安全插件(类似于SELinux),它本应该提供更多的安全。在我看来你不会需要这们一个安全系统,比较好处,它带来的更多的问题,比如你发现一些服务不正常,你查了一周,结果发现一切都OK,只是因为AppAmoor引起的问题。所以我禁用它,(如果后面你想安装ISPconfig,这一步是必须的)
我们可以这们禁用它:
/etc/init.d/apparmor stop
update-rc.d -f apparmor remove
aptitude remove apparmor apparmor-utils

