nginx代理服务器的简单实现
我们要创建一个nginx服务器,代理ip为192.168.0.101,本机作为测试主,本机的ip是192.168.0.234
Nginx代理服务器的配置
首先,配置好yum源
[root@server70 ~]# yum groupinstall -y "Development Tools" "Development Libraries"
[root@server70 ~]# yum install gcc openssl-devel pcre-devel zlib-devel –y
Lftp 192.168.0.254
下载nagios-3.2.1.tar.gz
Tar xf nginx-1.1.3.tar.gz
# groupadd nginx
# useradd -g nginx -s /bin/false -M nginx
#cd nginx-1.1.3
./configure/
--prefix=/usr /
--sbin-path=/usr/sbin/nginx /
--conf-path=/etc/nginx/nginx.conf /
--error-log-path=/var/log/nginx/error.log /
--http-log-path=/var/log/nginx/access.log /
--pid-path=/var/run/nginx/nginx.pid /
--lock-path=/var/lock/nginx.lock /
--user=nginx /
--group=nginx /
--with-http_ssl_module /
--with-http_flv_module /
--with-http_stub_status_module /
--with-http_gzip_static_module /
--http-client-body-temp-path=/var/tmp/nginx/client/ /
--http-proxy-temp-path=/var/tmp/nginx/proxy/ /
--http-fastcgi-temp-path=/var/tmp/nginx/fcgi/ /
--with-pcre
Make && make install
Vim /etc/init.d/nginx
#!/bin/sh
#
# nginx - this script starts and stops the nginx daemon
#
# chkconfig: - 85 15
# description: Nginx is an HTTP(S) server, HTTP(S) reverse /
# proxy and IMAP/POP3 proxy server
# processname: nginx
# config: /etc/nginx/nginx.conf
# config: /etc/sysconfig/nginx
# pidfile: /var/run/nginx.pid
# Source function library.
. /etc/rc.d/init.d/functions
# Source networking configuration.
. /etc/sysconfig/network
# Check that networking is up.
[ "$NETWORKING" = "no" ] && exit 0
nginx="/usr/sbin/nginx"
prog=$(basename $nginx)
NGINX_CONF_FILE="/etc/nginx/nginx.conf"
[ -f /etc/sysconfig/nginx ] && . /etc/sysconfig/nginx
lockfile=/var/lock/subsys/nginx
make_dirs() {
# make required directories
user=`nginx -V 2>&1 | grep "configure arguments:" | sed 's/[^*]*--user=/([^ ]*/).*//1/g' -`
options=`$nginx -V 2>&1 | grep 'configure arguments:'`
for opt in $options; do
if [ `echo $opt | grep '.*-temp-path'` ]; then
value=`echo $opt | cut -d "=" -f 2`
if [ ! -d "$value" ]; then
# echo "creating" $value
mkdir -p $value && chown -R $user $value
fi
fi
done
}
start() {
[ -x $nginx ] || exit 5
[ -f $NGINX_CONF_FILE ] || exit 6
make_dirs
echo -n $"Starting $prog: "
daemon $nginx -c $NGINX_CONF_FILE
retval=$?
echo
[ $retval -eq 0 ] && touch $lockfile
return $retval
}
stop() {
echo -n $"Stopping $prog: "
killproc $prog -QUIT
retval=$?
echo
[ $retval -eq 0 ] && rm -f $lockfile
return $retval
}
restart() {
configtest || return $?
stop
sleep 1
start
}
reload() {
configtest || return $?
echo -n $"Reloading $prog: "
killproc $nginx -HUP
RETVAL=$?
echo
}
force_reload() {
restart
}
configtest() {
$nginx -t -c $NGINX_CONF_FILE
}
rh_status() {
status $prog
}
rh_status_q() {
rh_status >/dev/null 2>&1
}
case "$1" in
start)
rh_status_q && exit 0
$1
;;
stop)
rh_status_q || exit 0
$1
;;
restart|configtest)
$1
;;
reload)
rh_status_q || exit 7
$1
;;
force-reload)
force_reload
;;
status)
rh_status
;;
condrestart|try-restart)
rh_status_q || exit 0
;;
*)
echo $"Usage: $0 {start|stop|status|restart|condrestart|try-restart|reload|force-reload|configtest}"
exit 2
esac
退出,给/etc/init.d/nginx 执行权限
Chmod +x /etc/init.d/nginx
使其开机不能自动启动
Chkconfig --add nginx
下面我们可以启动nginx了
#service nginx start
然后看一下80端口是否已经启动
#netstat -tnlp
[root@server70 ~]# netstat -tnlp
Active Internet connections (only servers)
Proto Recv-Q Send-Q Local Address Foreign Address State PID/Program name
tcp 0 0 127.0.0.1:2208 0.0.0.0:* LISTEN 2310/hpiod
tcp 0 0 0.0.0.0:111 0.0.0.0:* LISTEN 2000/portmap
tcp 0 0 0.0.0.0:80 0.0.0.0:* LISTEN 8448/nginx.conf
可以看见,80端口已经开启
之后我们可以看一下nginx的测试页 ,直接输入代理服务器的ip
当出现welcome 几个单词时就表示安装nginx成功,下面只剩配置
Cd /etc/nginx/
Cp nginx.conf nginx.conf.bak
然后在/etc/nginx/nginx.conf 下修改并添加如下内容
events {
worker_connections 51200;
}
server {
listen 80;
server_name localhost;
#charset koi8-r;
#access_log logs/host.access.log main;
location / {
root /web;
index index.html index.htm;
}
location /bbs {
root /web;
index test.html;
}
保存并推出
分别创建/web/ 和/web/bbs/
Mkdir /web
Mkdir /web/bbs
Echo “hello,are you ok” > / web/index.htm
Echo “hello” > /web/bbs/test.html
下面分别访问这两个页面文件,在浏览器中输入:http://192.168.0.101

http://192.168.0.101/bbs

当然,我们还可以做代理服务网页的访问控制,比如我们这时候对于/web/bbs/test.thml这个网页文件对于测试机可以访问的,下面我们要实现拒绝测试机访问。
那怎么实现呢,我们需要编辑/etc/nginx/nginx.conf
location /bbs {
root /web;
index index.html;
deny 192.168.0.234;#############只拒绝192.168.0.234访问
allow all; ################允许所有
保存退出,并重载文件
重新在测试机上访问/web/bbs/test.html
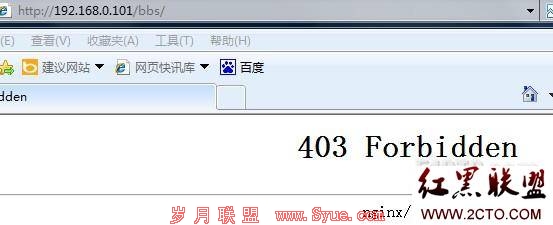
现在我们在没有拒绝访问的机子上测试是否能够访问,新打开一台虚拟机

作者“noever”

