Photoshop设计制作精美宇宙效果
Tutorial: Create A Retro Cosmic Design in Photoshop
This tutorial will teach you how to recreate the Retro Cosmic designs made popular by James White of Signalnoise. All you need is a copy of Photoshop and some time on your hands. In this particular example we’re going to create a retro cosmic rainbow but the techniques explained can be used in combination with any shape and colour.
Preview:

This is a cutout of the final design that will be created in 10 easy steps. So let’s get started.
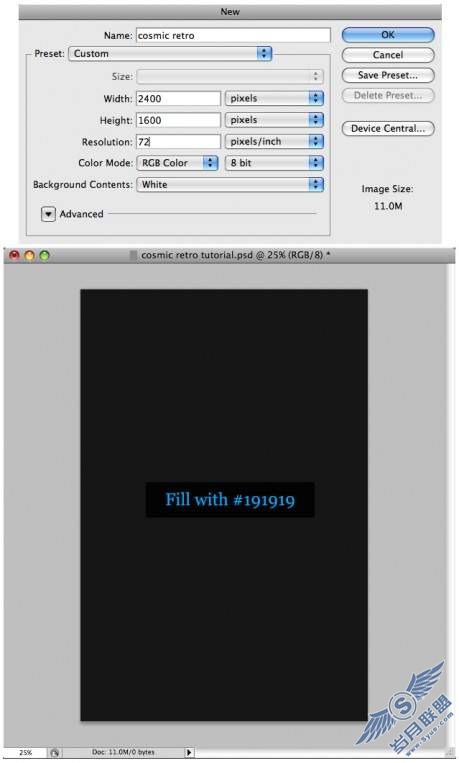
Step 1: Create document
Start by creating a new document of 2400px by 1600px. Fill the background with a dark grey. I used #191919.
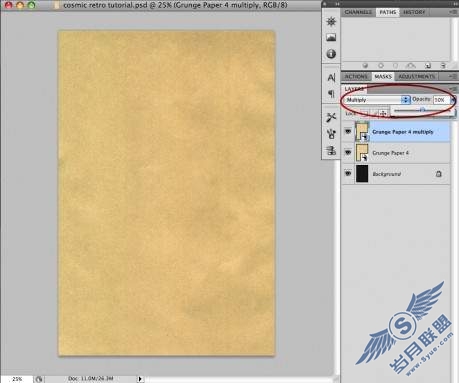
Step 2: Add Textures
Now we’re gonna add some nice Old Grunge Paper Textures which have been released on Fudgegraphics earlier. They can be downloaded here and we’re only going to need the textures number 3 and 4. First open Paper Texture 4 and place it on top of the background layer. You might want to scale it so that it fits the document. It’s a good practice to always convert images to smart object when scaling them down. This way you won’t compromise the quality should you decide to increase the dimensions of the design later on.
Duplicate the Paper Texture 4 Layer, change the blending mode to Multiply and set the Opacity to 50%.
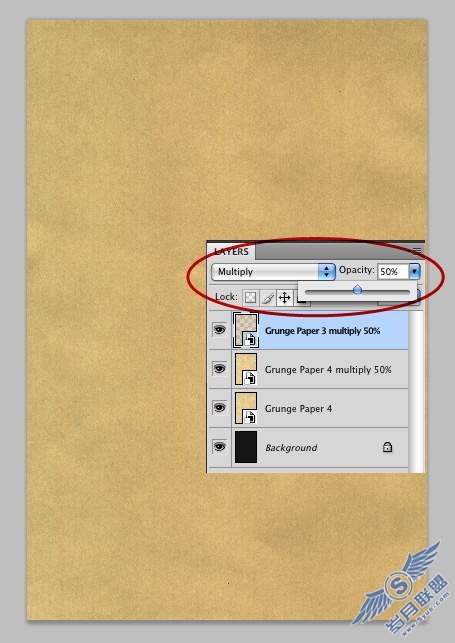
To finish of with the textures we’re gonna add Paper Texture 3 on top of the layers. Again use Multiply as blending mode and set the Opacity to 50%.
Step 3: Adjust the Background
Now add a Black&White Adjustment Layer to desaturate the background. Again this is the most inobtrusive way of doing it. Alternatively you could merge all of the layers and desaturate them using the shortcut Cmd+Shift+U.
Next we’re going to add a Curves Adjustment Layer using the settings shown below. This will darken the backgound which should now look like this:
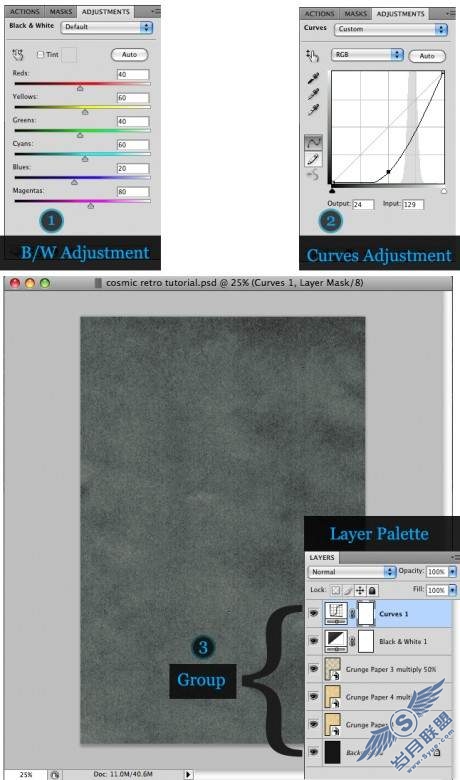
Once you’ve completed all these steps you should put all the layers in a group and name it “background”. This will help you keep things organized.
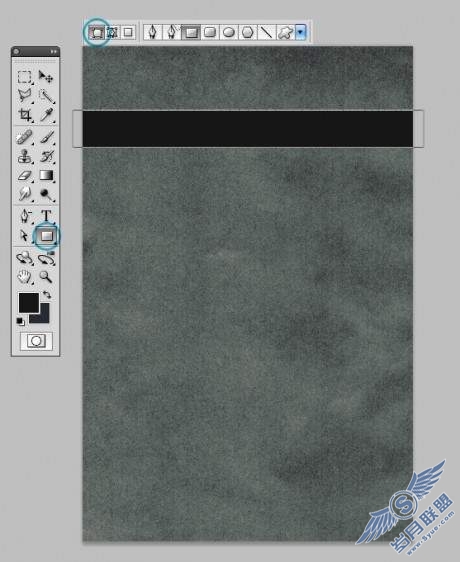
Step 4: Adding the Shapes
Now that we’ve prepared the background we can finally start to add our geometric shapes. Select the Rectangle Tool and make sure you have selected the “Shape Layer” option. The fill colour is not important as we are going to alter it through the Layer Style anyways. Draw a rectangle like shown below (roughly 1700px by 180px).
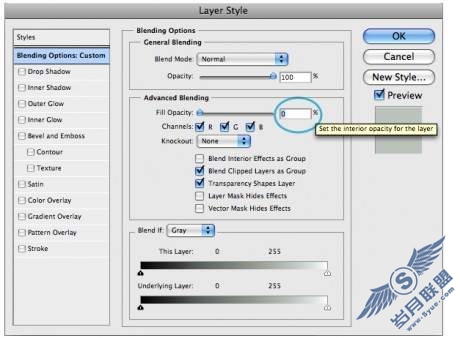
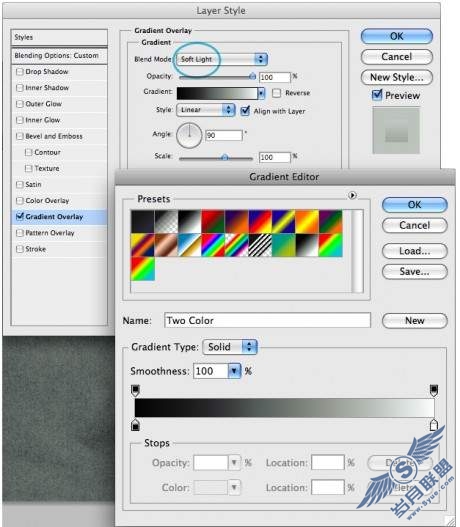
Step 5: Changing the Layer Style of Shape
Open up the Layer Style for the rectangle shape and set the Fill Opacity to 0%. Then add a simple Black to White gradient at an angle of 90º and change the Blending Mode to Soft Light.
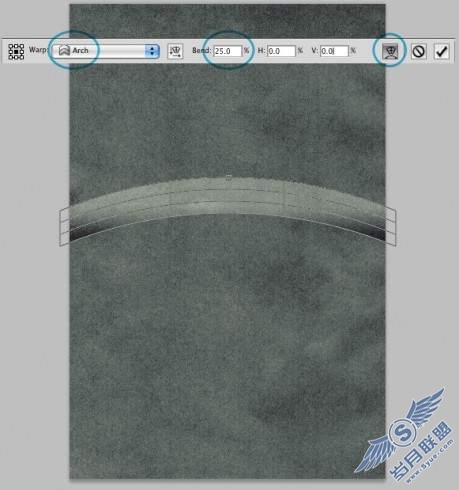
Step 6: Warp Rectangle into Arch
With the rectangle shape layer still selected choose Edit > Transform Path > Warp. Use the Arch Preset and set the Bend to 25%. Hit Enter.
Step 7: Duplicate and Move Arch
Hold Alt+Shift and move the shape downwards. This will duplicate the layer (Alt key) while keeping it inline with the original layer (Shift key). Repeat this step until you have for instances of the Arch layer. Select all 4 layers and choose “distribute vertical centers” from the distribute palette.
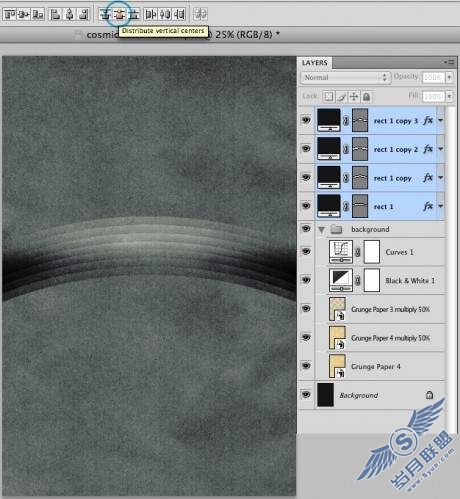
Now group the 4 layers and duplicate the group. Select the group copy and again while holding Alt+Shift drag the layers downwards. Align the 2 groups vertically and distribute them to your liking. It should look similar to this.

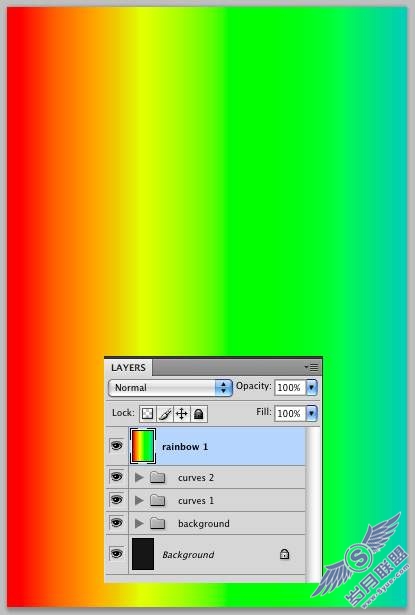
Step 8: Adding Colours
Now that we have the basic layout of our design it’s time to add some colours to it. Create a new layer on top and select the Gradient tool. Define a nice colourful rainbow gradient and apply it horizontally to the blank layer.
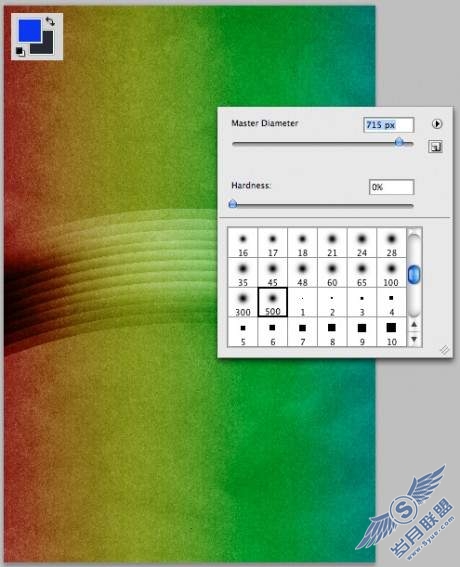
Change the layer blending mode to Soft Light. Choose a dark blue and paint over the non-rainbow areas with a large soft brush.
In normal blending mode the rainbow layer should look similar to the picture below.
Step 9: Enhancing Colours:
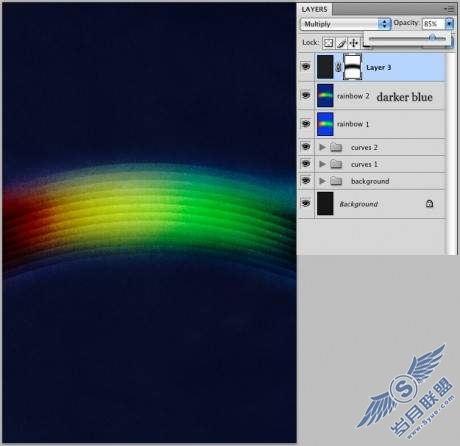
As the “soft light” blending mode suggests its effect is not very strong. Hence we’re gonna duplicate the rainbow layer to get more vibrant colours. Keep the soft light setting but change the Layer Opacity to 40%. Choose an even darker blue and paint over the non-rainbow areas as before.
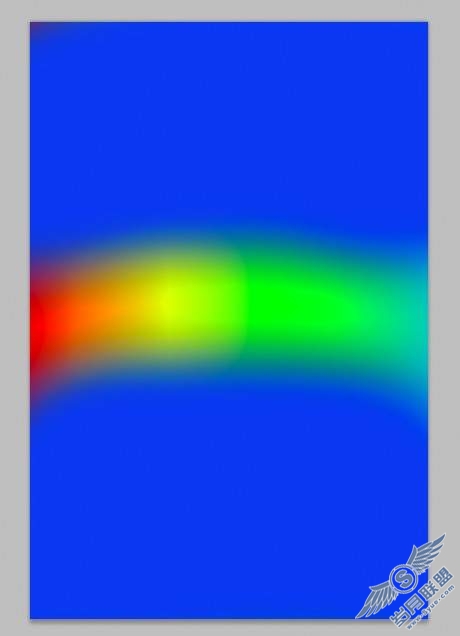
Now create a new layer and fill it with a dark grey colour. Set the blending mode to Multiply and change the Layer Opacity to 85%. Add a layer mask and with a large soft brush (same as we used before) hide the rainbow part. This is done by choosing Black as fill colour and painting over the rainbow. The beauty of layer masks is that if you masked too much simply switch too White and paint over the areas you want to be visible again. Your design should look similar to this.
Step 10: Adding Stars
As finishing touch we’re gonna add some star clusters to our design. Go to Flickr and download the Chritmas Tree Cluster photo by Luca Argalia aka Skywalker79 in its original size. Place it on top of all the layers. Set the Blending Mode to Screen. Scale and place it to your liking. Again I converted the photo to a Smart Object before scaling.
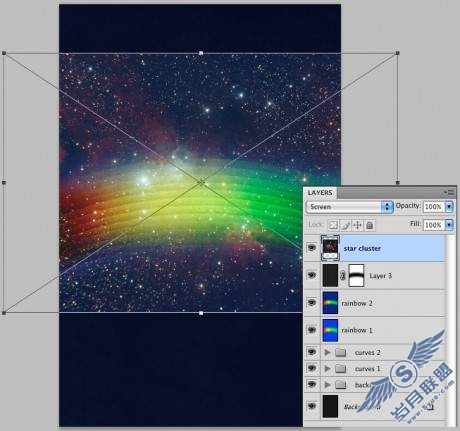
Add a Layer Mask to the star cluster layer and hide the edges of the photo as well as the parts you don’t want. I also added a Black/White Adjustment layer to the stars to get rid of all the colours.
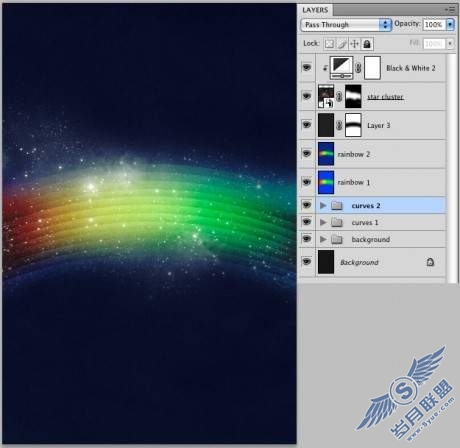
Final Image
That’s it. The design can be finished of with a rounded border and dark vignette. Here’s the final retro cosmic design that we have created today.
The Possibilities are endless
Here’s another piece designed using the same techniques.
I encourage you to play with different shapes, angles and gradients. Go nuts, have fun and don’t forget to post your images in the Fudgegraphics User Showcase on Flickr for us to see.
Please leave a comment if you run into any trouble completing this tutorial.
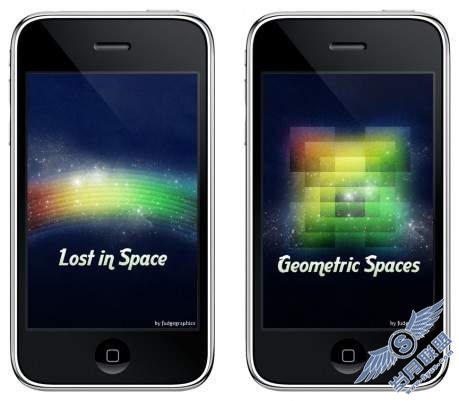
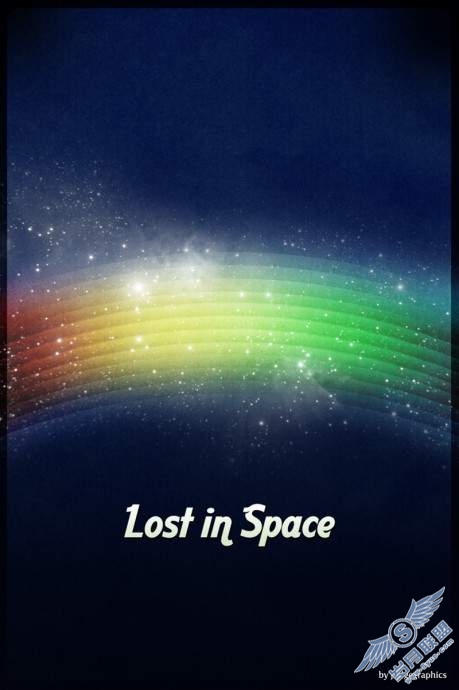
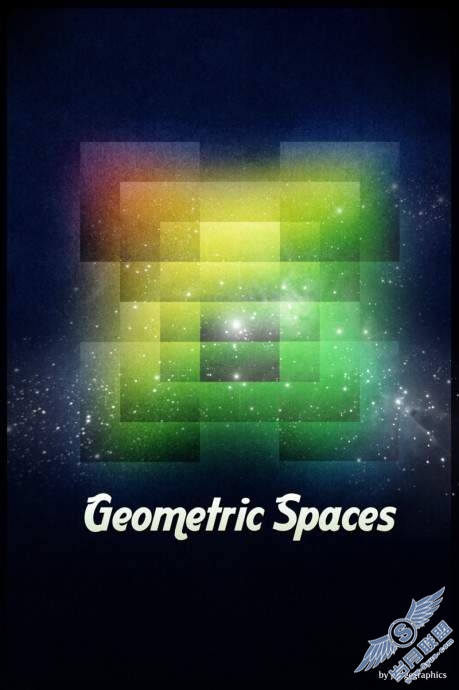
iPhone Wallpapers:
As a special bonus I made these 2 designs into iPhone/iPod Touch Wallpapers. I hope you like them.